

Since its inception, printmaking has revolutionized the environment as we know it. It gave writers, publishers, and artists the advantage of creating copies. In convert, it exposed much more persons to their get the job done a lot quicker. Some of the earliest printing procedures were being made use of in China all over the 9th century, which associated working with hand-carved blocks. In the 15th century, the Gutenberg push built printing on a mass scale more quickly than preceding solutions. In the electronic age, we could acquire the notion of generating a number of copies of some thing for granted due to the fact we can have it with a brief scan or a click on.
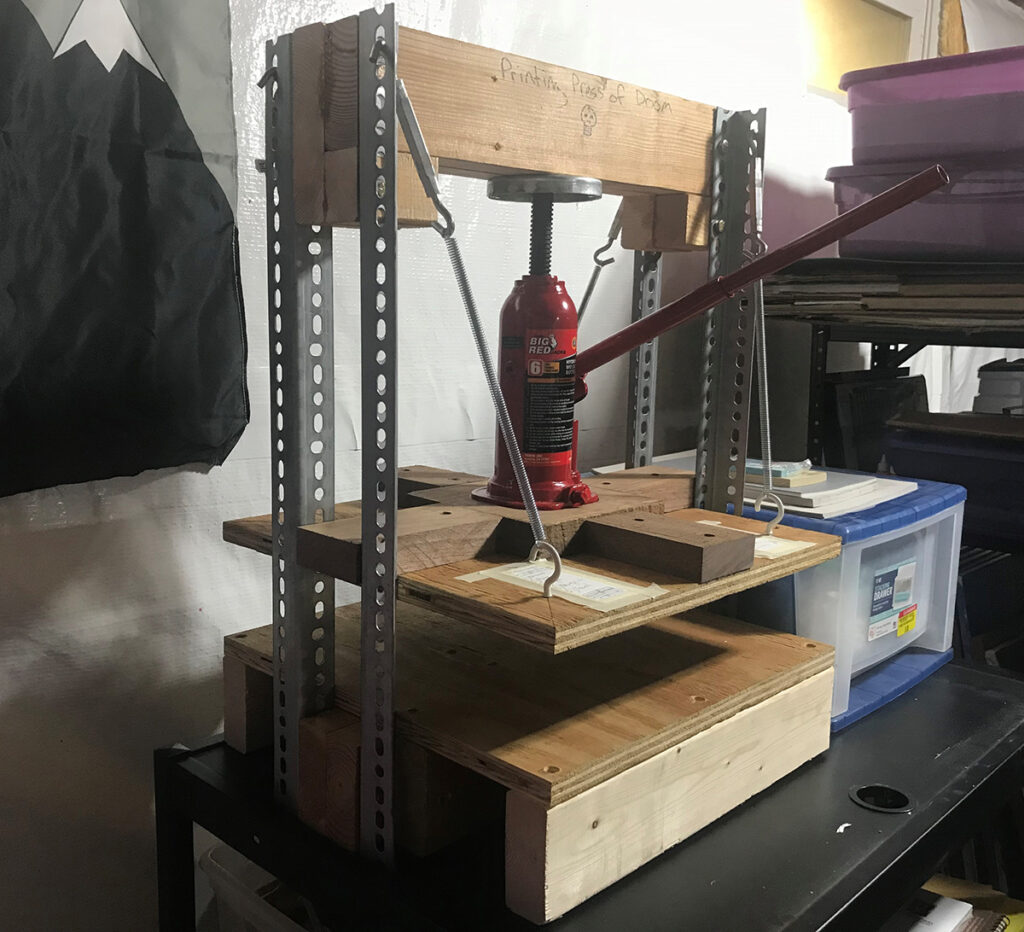
Do not underestimate the printmaking system. Exposing little ones to this artform is remarkable and opens the door to several innovative possibilities. Quite a few artwork academics choose for hand printing solutions mainly because they do not demand a press. If you are privileged to have accessibility to a printing push in your studio, take into consideration by yourself a person of the fortunate handful of. If you are hunting for an affordable press, with a number of very simple hand and electrical power instruments, you can create your have working with an automotive bottle jack.

Dependent on the rates of community supplies, you can create this push for $100–$300. In comparison, most merchants carry etching or platen-design presses for hundreds if not hundreds of pounds far more. The most pricey buys for this Do it yourself are the automotive bottle jack and slotted steel. If you are thrifty, you can invest in a bottle jack next-hand as extended as you make sure it does not leak and the piston goes up and down smoothly. A six-ton jack should really suffice for all of your classroom printing wants. If you want nearly anything even bigger, it will demand taller slotted metal, which fees a lot more. Anything at all scaled-down than three-ton may possibly not offer enough pressure for specific print sorts.
A further issue to consider is if your college district can set the money for this develop into your artwork spending budget. If you have to shell out out of pocket, inquire about a reimbursement program. Implementing for a grant is a further possibility to test.
Let us appear at the elements you will need for this create:
Here’s a checklist of instruments you will have to have:
- Circular, miter, or radial arm saw (a handsaw will perform way too)
- Drill and influence driver with bits
- Tape evaluate
- Wooden clamps
- Wood glue
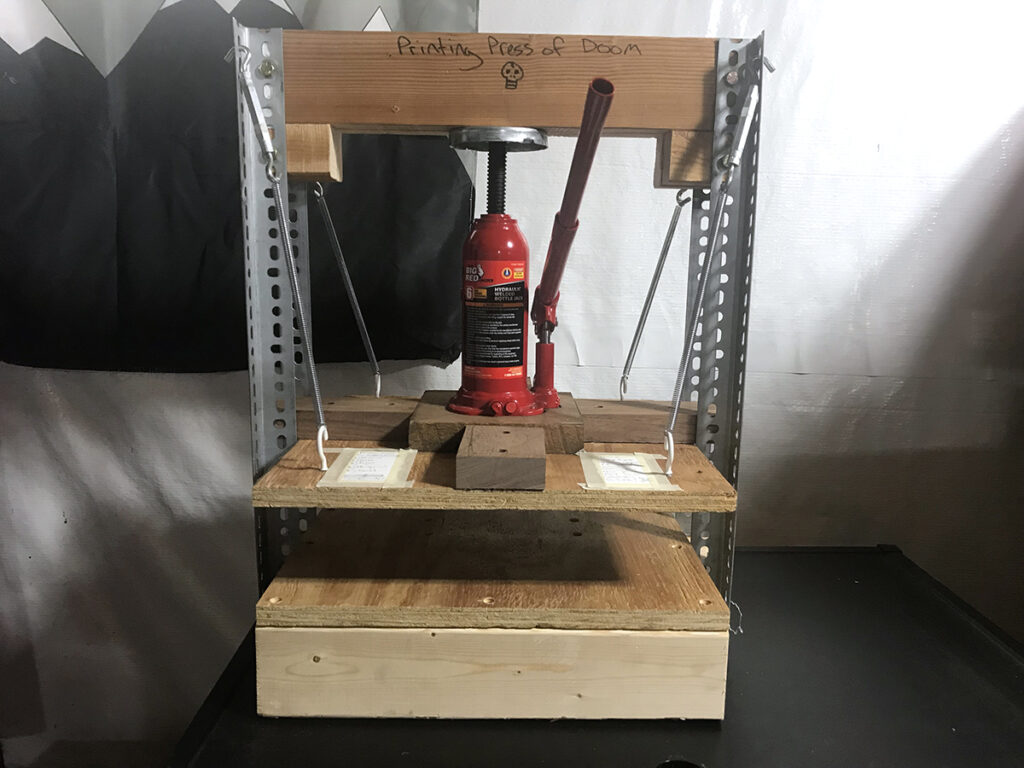
Once you have gathered all of your materials and applications you are all set to establish! The video, How to Build a Bottle Jack Push Demo, is exceptionally beneficial in visualizing the push and measures. Maintain in brain you can modify this in any way to healthy your requires!
Here are 10 ways to develop your bottle jack printing push.
1. Make a sketch and diagram for your make.
Decide all the sizes and dimensions of your push like the width, size, and top. Keep in head to hold items relatively lesser, even with a 6-ton push. It is highly recommended not to exceed a 20″ width or size on the foundation.

2. Slice 2 2 x 4s for the header and then glue and clamp them collectively.
When dry, established the header piece apart for later on. Make absolutely sure it sticks out extended plenty of to connect to the slotted steel for a afterwards stage.
3. Cut 2 2 x 4s for the center of the base and then glue and clamp them together.
Immediately after it dries, this will be the middle of your press base. Make sure it sticks out long plenty of to connect to the slotted metal for a afterwards phase.
4. Cut and screw the 2 x 4s to frame out the press base.
Use the laminated 2 x 4 in the center of your foundation. Use other 2 x 4s to make a framework for the prime of the base.
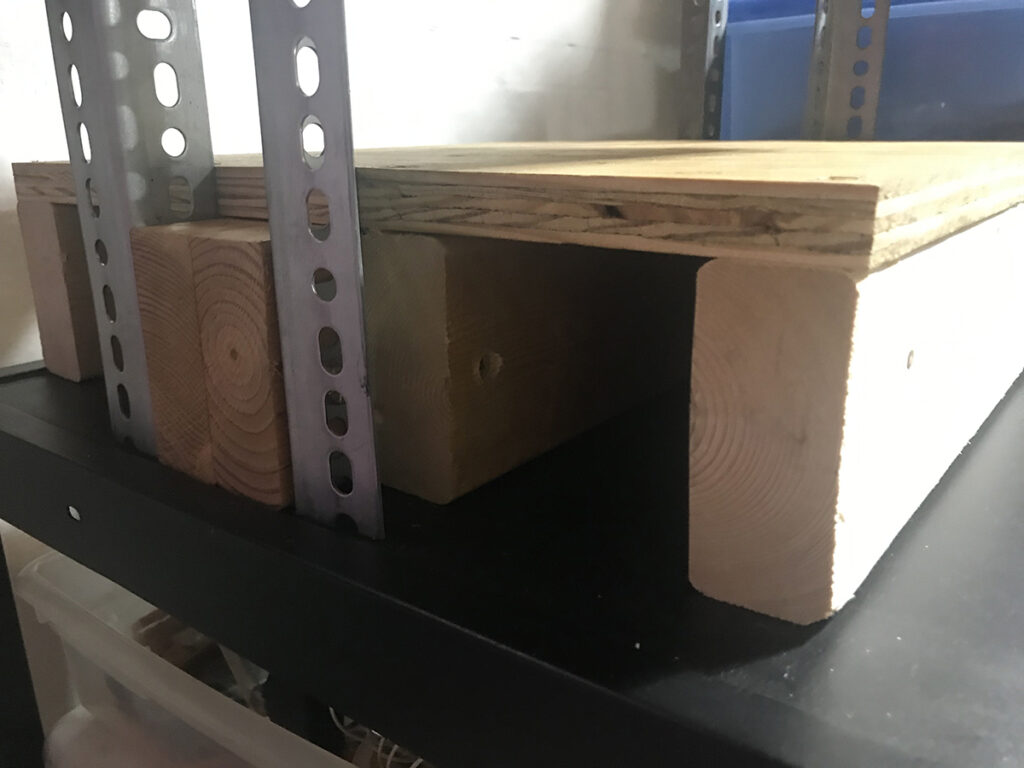
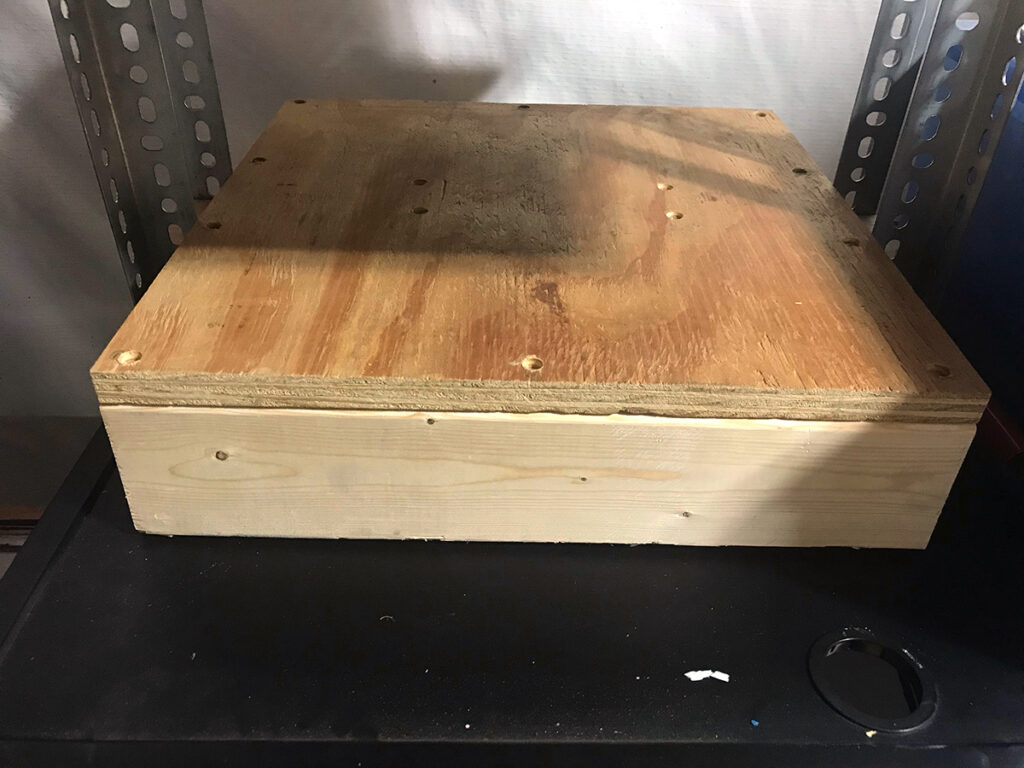
5. Reduce and screw the plywood for the prime of the base.
Screw the plywood ideal on top rated of the 2 x 4 base. It is advisable that you countersink your screw heads so they do not demonstrate up on a final print.
6. Set up the slotted steel on each and every side of the laminated foundation and insert the laminated header for the top. Then, drill holes and insert the hex bolts.
This element can be tough so use a wood clamp or two to keep the metal in location even though you drill and drive your hex bolts. If you do not have an affect driver for the bolts, you can use ratchets and a wrench to safe them in place. Make absolutely sure it is comfortable!
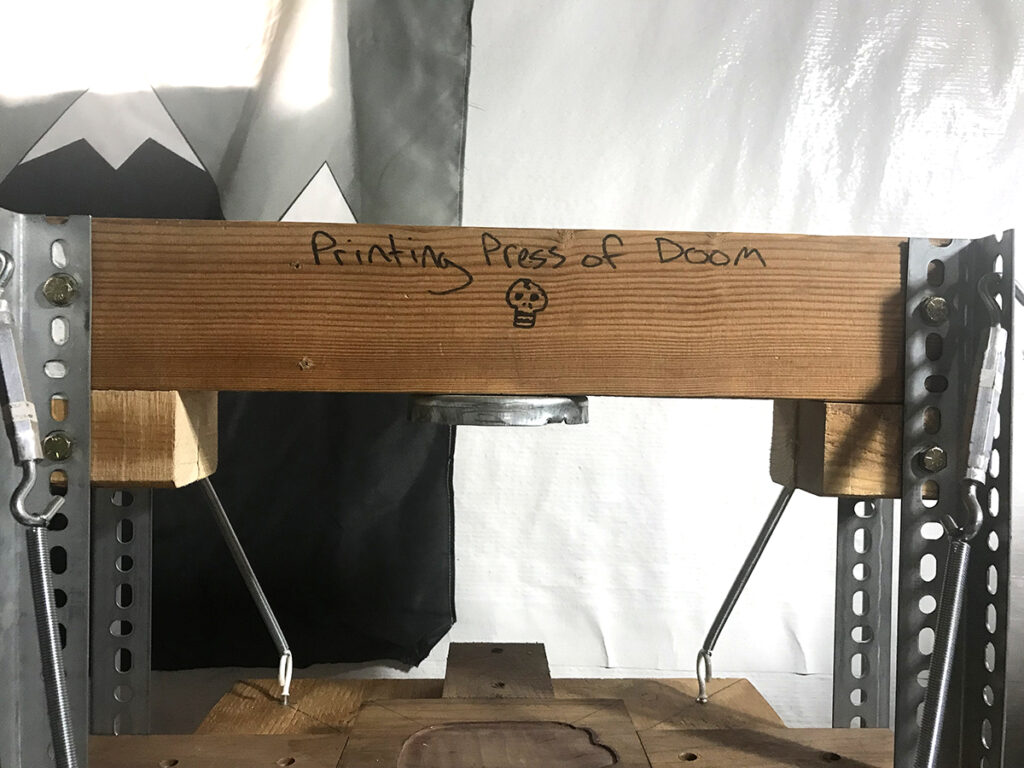
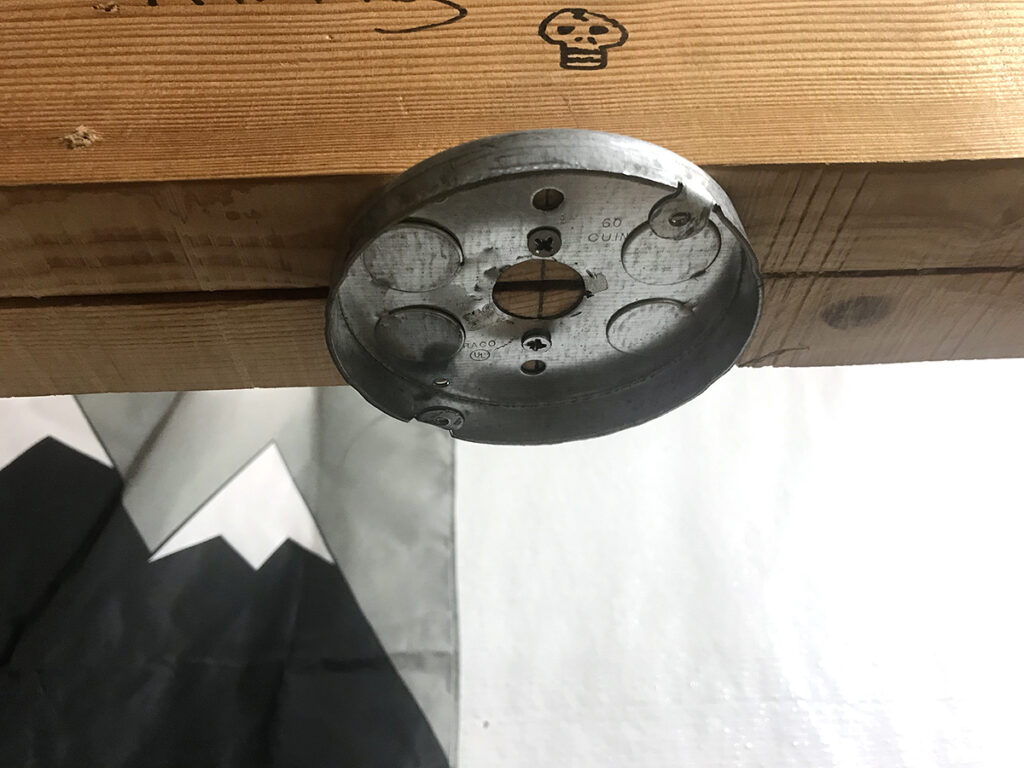
7. Attach the steel electrical box to the header.
Uncover the useless-centre of your header and screw in the metallic circle or electrical box. This serves as a ram cup for your press so it does not dig into the wooden around time.
8. Slice a piece of plywood for the platen pressboard.
Make guaranteed the platen press board is the same sizing as your plywood foundation.
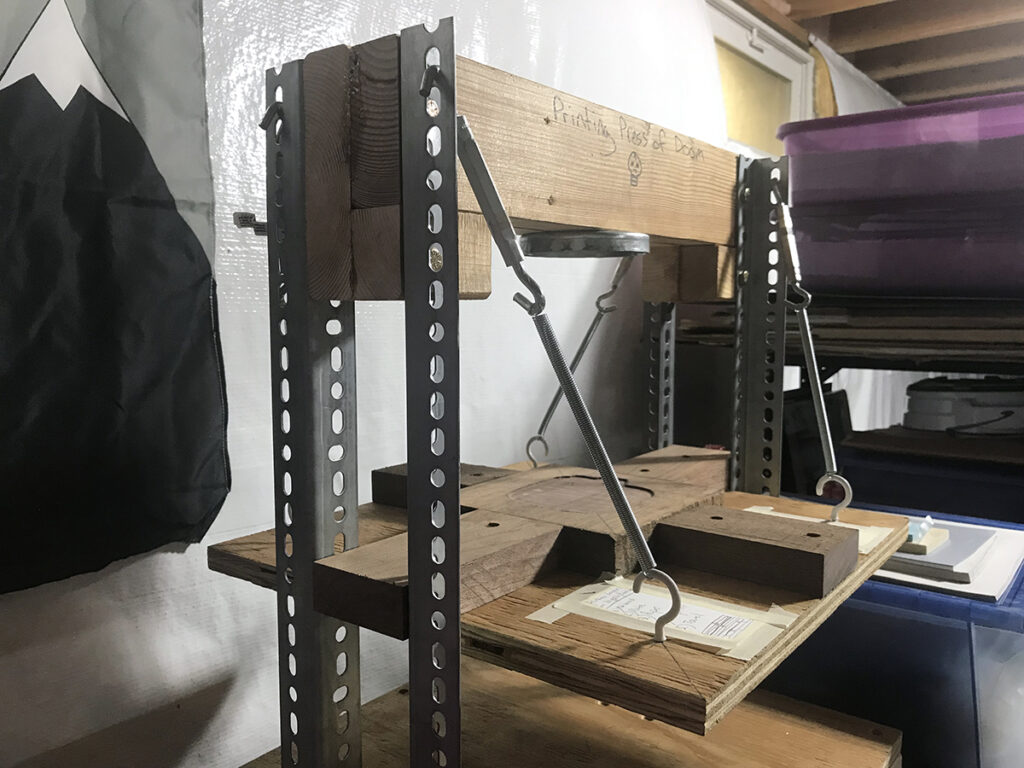
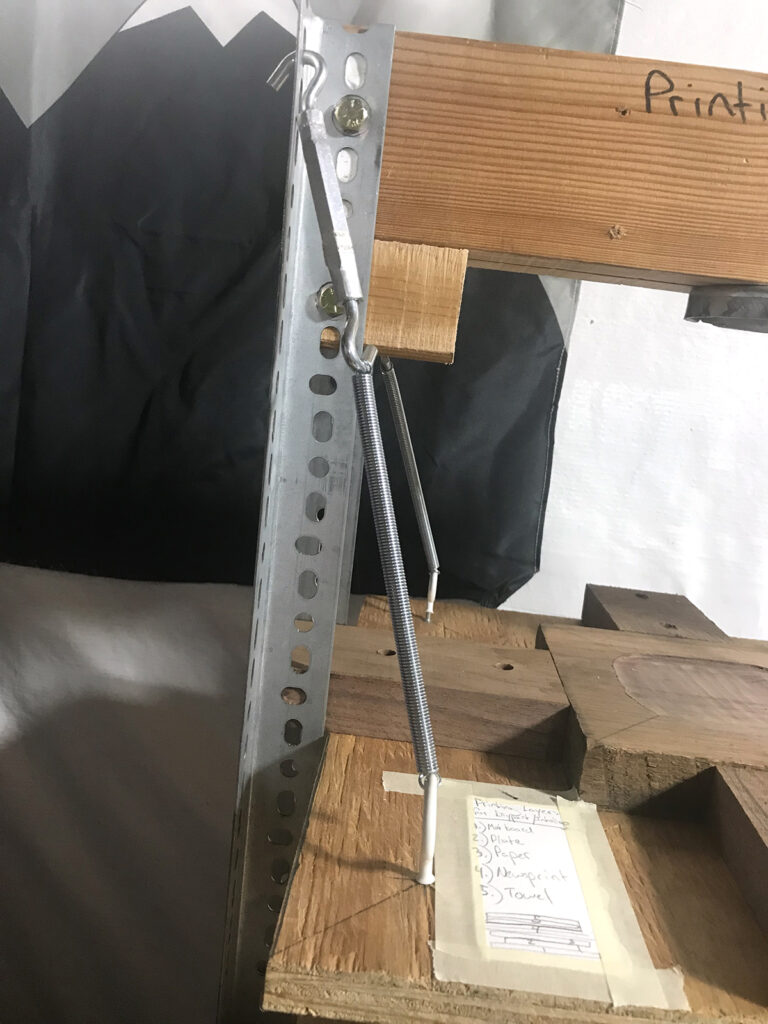
9. Screw 4 eye hooks on to the platen pressboard. Then connect bungee cords or turnbuckles and springs to the header and eye hooks.
10. Uncover the dead-heart of the platen board and put the bottle jack in the center.
It is a good idea to make some kind of foundation for the bottle jack so it does not slide all over in the course of use.
Let’s appear at the procedure of the press.
- Spot your jack on the center of your platen board.
- Set up your print. It may perhaps appear a little unique depending on what kind of print you are producing.
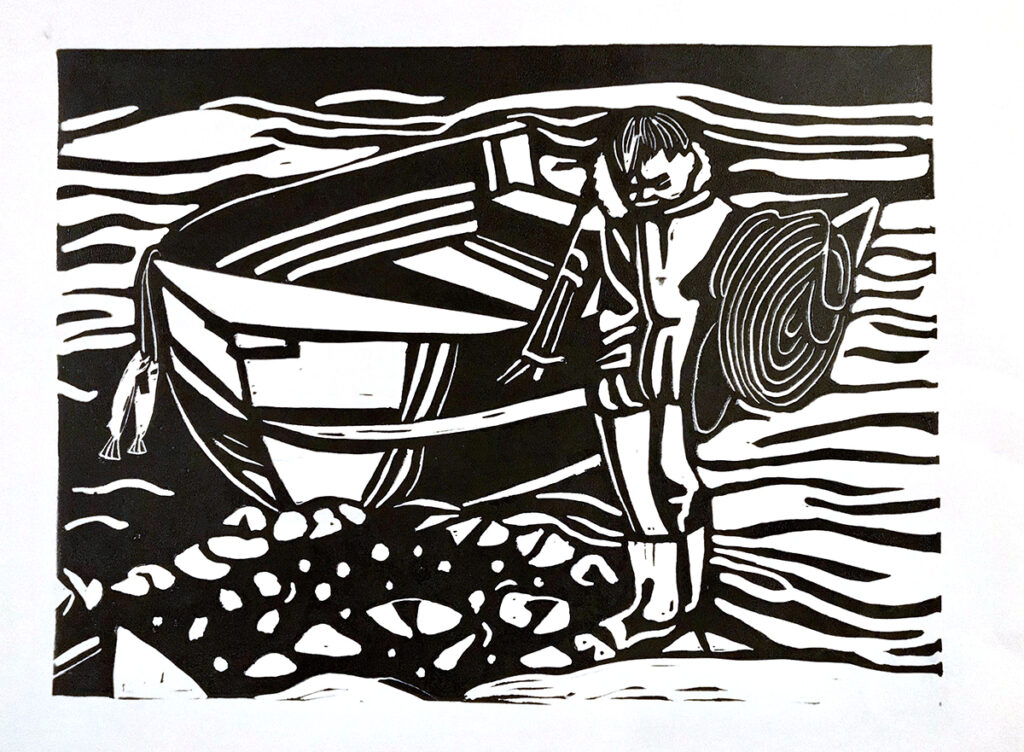
For linocut prints, place a piece of tagboard on the base, the inked block, then the paper.
For etching or intaglio prints, place a piece of tagboard on the base, the inked block, printing paper, butcher paper, then a folded towel. - Run the jack as regular. (Consult your owner’s handbook for your distinct product.) Most jacks are the same. Tighten the valve, insert the cope with into the piston cup, and pump the piston to elevate the jack. In this case, boosting the jack closes the hole among the platen board and the base.
- Pump the jack right until the platen or leading board fully satisfies your print, and you can not pump any longer. Be cautious not to overpump your jack, or a catastrophic failure can occur, these types of as your header board cracking. Bear in mind, these jacks raise vehicles, so it has more than plenty of pressure to make your prints!
- Following you can not pump the press any longer, release the valve on your press, which need to result in the platen board to increase. Slide out your print and admire it!
This selfmade press does acquire some observe to use and great-tune. Use it as a trainer-guided station or for demonstrations in an elementary setting. In middle or large university, consider showing your students how to use the press and center it about a printmaking challenge of your choice. This press can also handle some bookmaking or embossing initiatives. Grab some applications and get began creating this bottle jack press. The faster you create it, the quicker you and your learners can use it!
If you are hunting for printmaking classes and assets, appear no even further!
How can you see on your own working with this Do it yourself push in your classroom?
Do you have any modifications or improvements you would make to this develop? If so, what are they?


More Stories
That's a wrap for Art in Bloom 2023!
A Vortex of Hoplessness – Maniscalco Gallery
How Personal Stories and Backstories Enables Word-of-Mouth Marketing for Visual Artists